Quick
Fuel Dump PAGE...
UNDER
DESTRUCTION
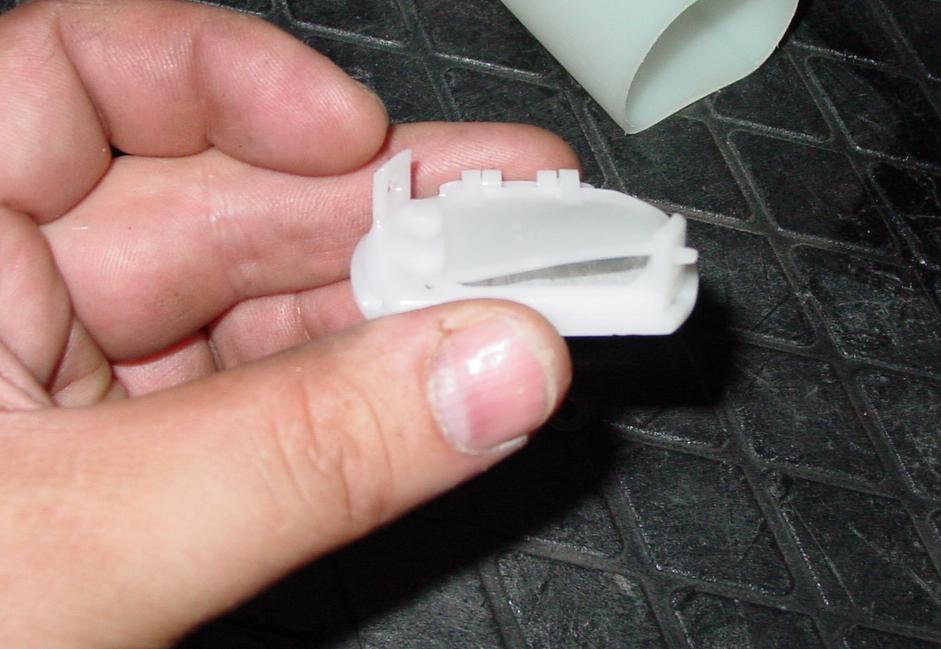
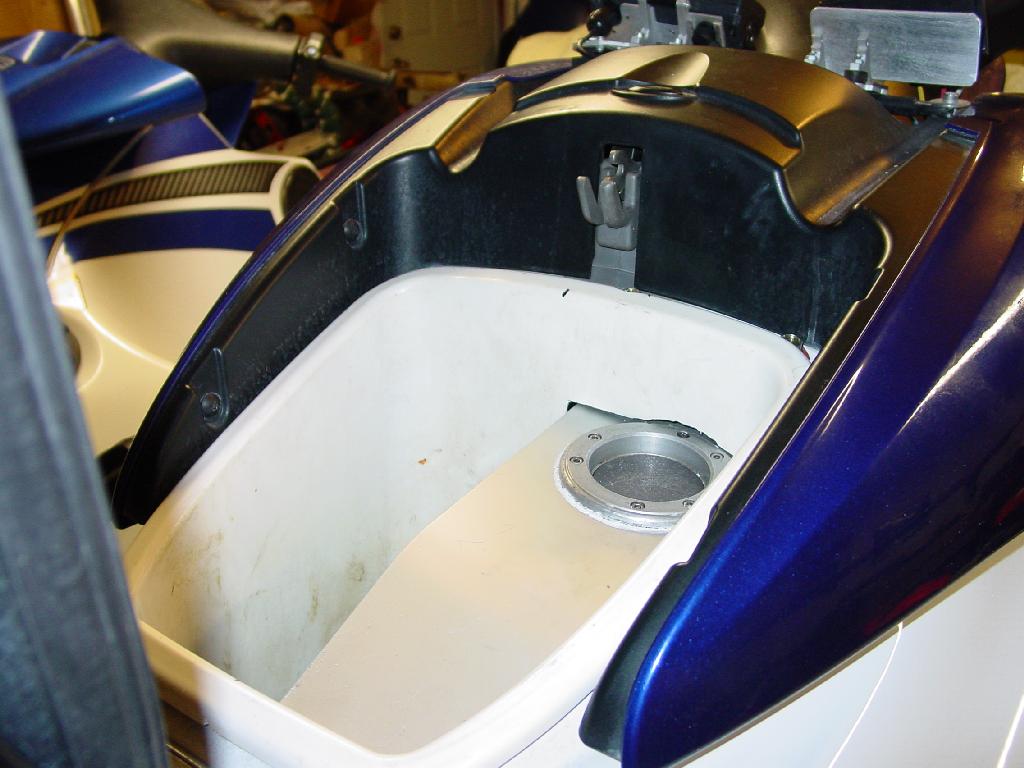
Fuel Door Warpage... This little bad boy was causing some type of obtruction when I tried to use the reserve setting. So, whatever, Yamaha had in mind, is now HISTORY... I reinstalled the lower screen without the trap door.
Be forewarned. If you screw up, the gas tank comes out the engine compartment area. Wouldn't that just SUCK.
Parts List:
| Qty | Parts | Manufacturer |
| 1 | Male Probe | Red Head |
| 1 | Custom Aluminum Receiver Housing. | Unkn. |
| 6" | 3" OD Aluminum tubing. | Capital Metals |
| 1 | JB WELD | |
| 11 | SST wood screws. | Ace Hardware |
| 1 | Insinkerator SST garbage disposal sink flange. | Home Depot |
| 2 | 1056-33 p/n 3" ID sewage pipe rubber couplers. | Home Depot |
| 4 | SST -64 Hose Clamps. | Tridon. |
| 1x1 | 1/8" Aluminum flat stock, painted or anodized. | Superior Metal. |
| 4 | #6 SST hardware for attachement of metal plate to hull. | Ace Hardware. |
Time/Tools to Install:
| Hrs | Action. | Who | Tools Needed |
| 1 | Design final location, and mark up of tank. | installler. | Permanent marker, tape measure, completed Quick Dump tube assembly |
| 1 | Cutting out Tank Hole. | installer. | Cardboard Pattern, box cutter. |
| 1 | Flange holes. | installer | Drill press, 1/4" drill bit, can of black spray paint.. |
| 1 | Drill holes, and clean up of flange area. | installer. | Air Drill, Shop vac, Box cutter. |
| unkn | Aluminum Receiver Housing | Weld Shop | unkn. |
| 4 | Pipe design, cut, and assembly. | installer. | Chop saw, tape measure. |
| 1 | Final Asembly of tube and cleanup. | installer | screwdriver. |
| 1 | Design of support plate. | installer | tape measure, 1/4 aluminum plate, permanent marker. |
| unkn | Welding of support plate to upper flange assembly. | Weld shop. | unkn. |
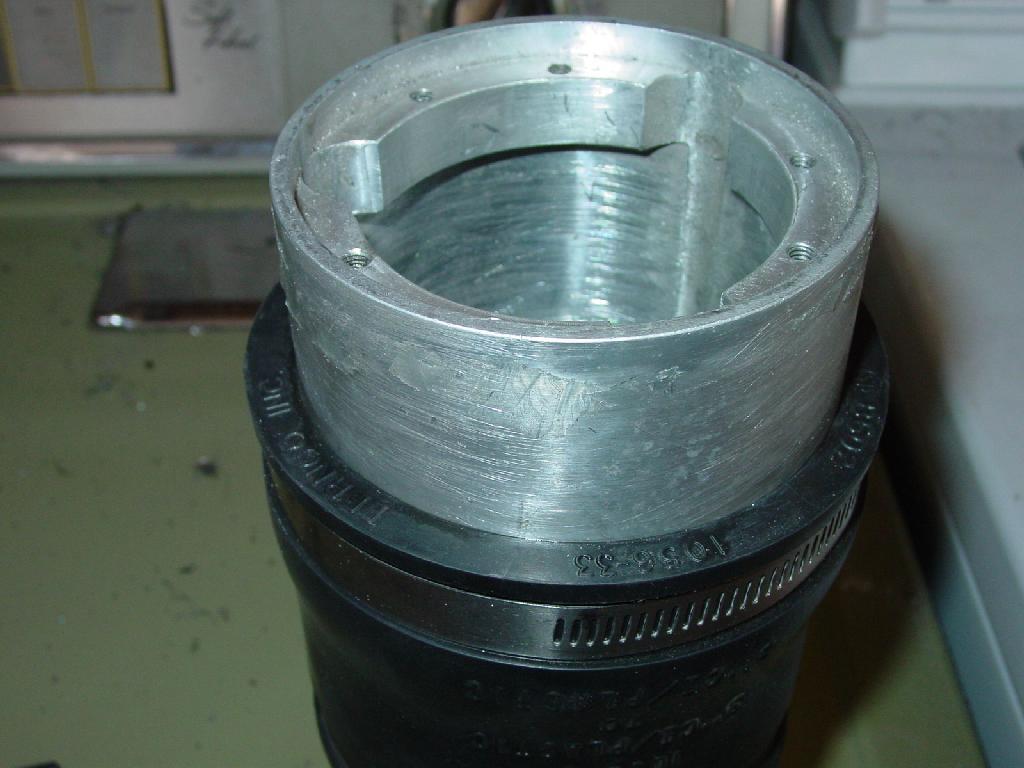 -The
adaptor, welded by some unknown shop.
-The
adaptor, welded by some unknown shop.
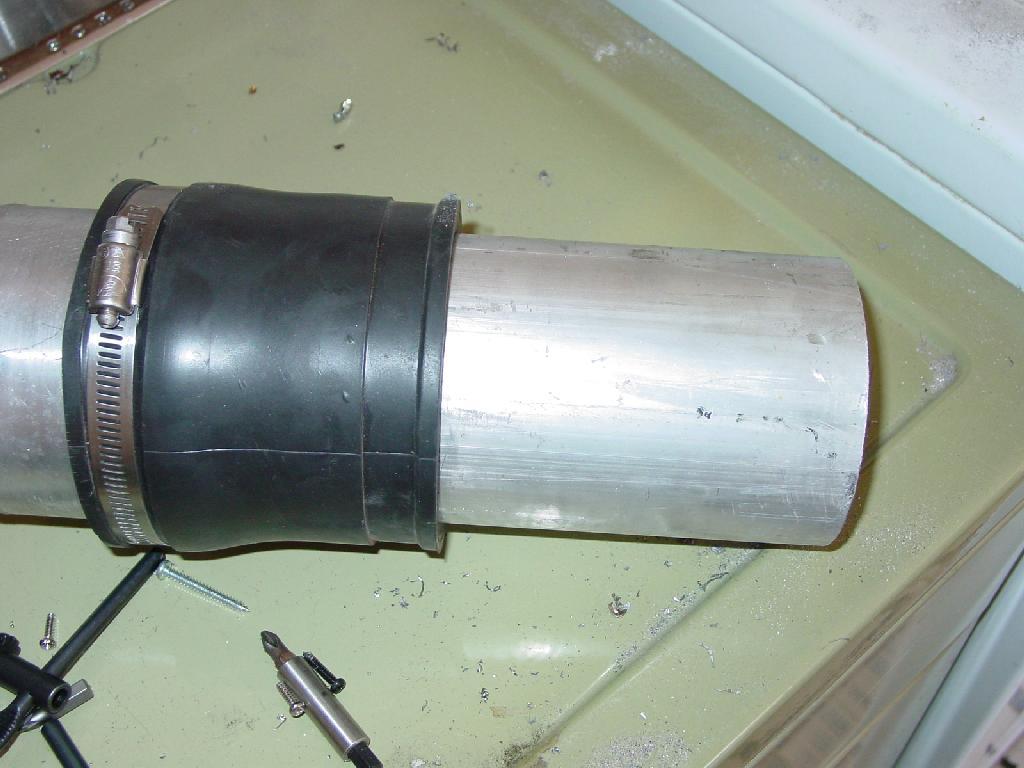 -The
rubber sewer line connector over the 3"OD Aluminum Tubing.
-The
rubber sewer line connector over the 3"OD Aluminum Tubing.
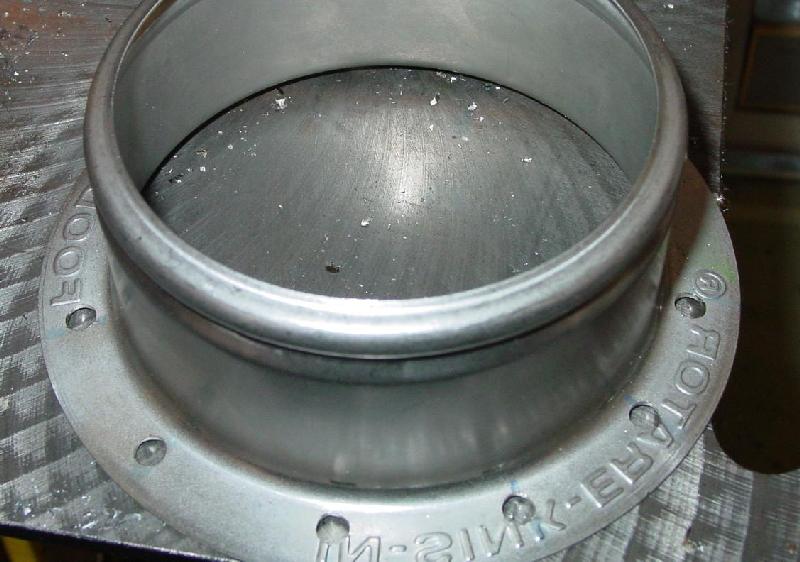 -The
"insinkerator" flange. The heart of the system!
-The
"insinkerator" flange. The heart of the system!
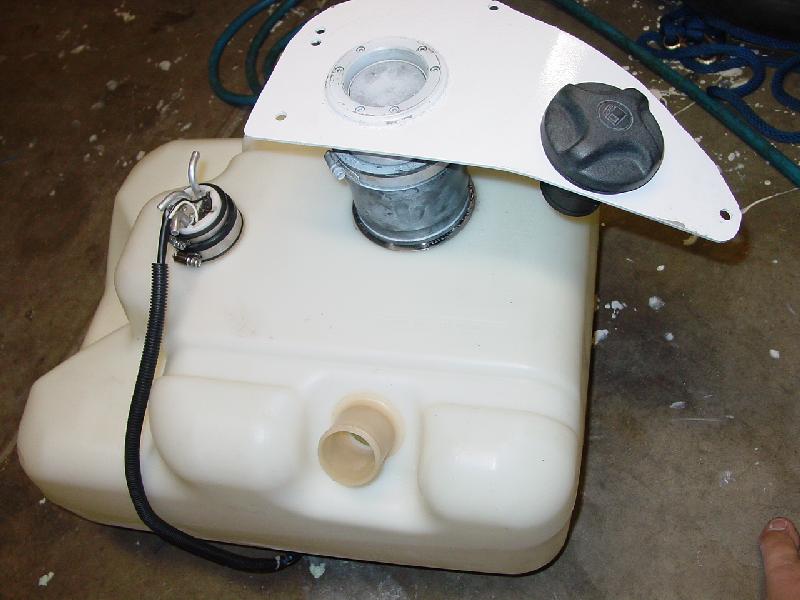
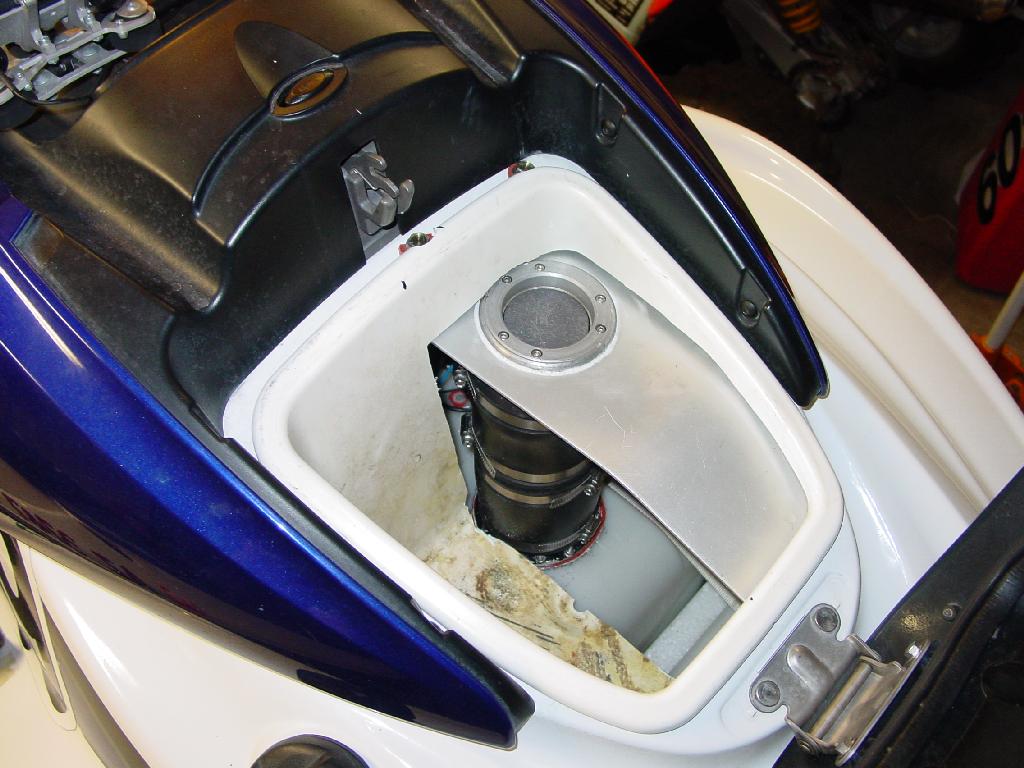
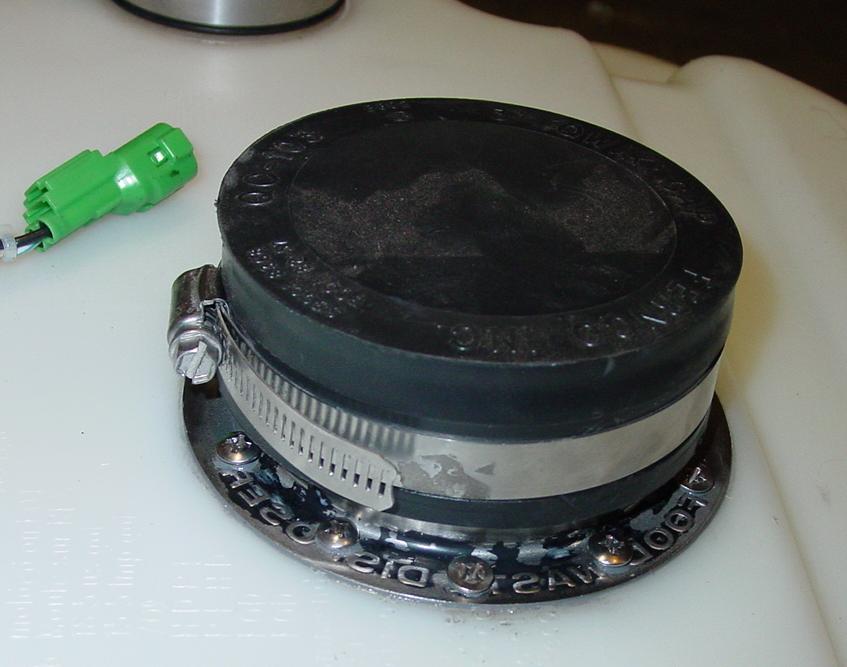 CThis
is the flange installed. I used JB weld on the second installation with
SST wood screws. The first one, I used a rubber gasket and 1211 with machine
screws. The 1211 and the rubber gasket kept pulling out. The JB weld is
stronger/tighter/cleaner/ and does not break down around gas. Notice the
black paint on the flange, and the remnants of it on top of the tank? I
used spray paint to mark the holes for drilling.The insinkerator, er...
high tech quick dump flange mounted with #4 screws, nylocks, fender washers.
CThis
is the flange installed. I used JB weld on the second installation with
SST wood screws. The first one, I used a rubber gasket and 1211 with machine
screws. The 1211 and the rubber gasket kept pulling out. The JB weld is
stronger/tighter/cleaner/ and does not break down around gas. Notice the
black paint on the flange, and the remnants of it on top of the tank? I
used spray paint to mark the holes for drilling.The insinkerator, er...
high tech quick dump flange mounted with #4 screws, nylocks, fender washers.
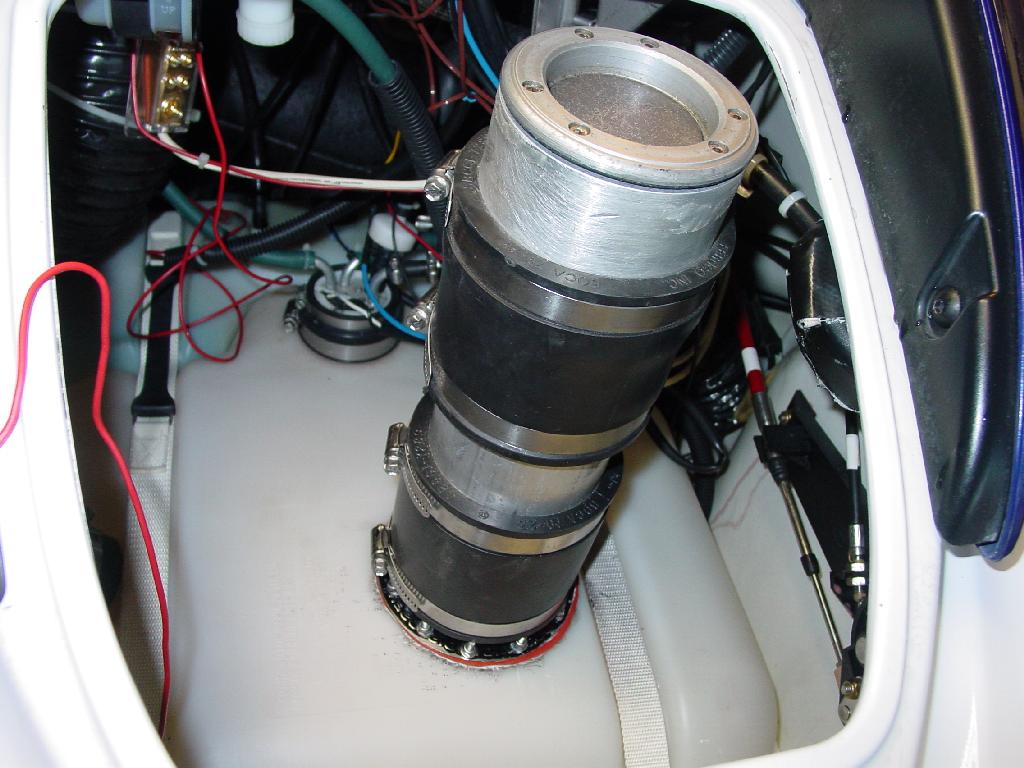 Final assembly mounted on top of the fuel tank. This one was using the
rubber gasket and machine screws.
Final assembly mounted on top of the fuel tank. This one was using the
rubber gasket and machine screws.
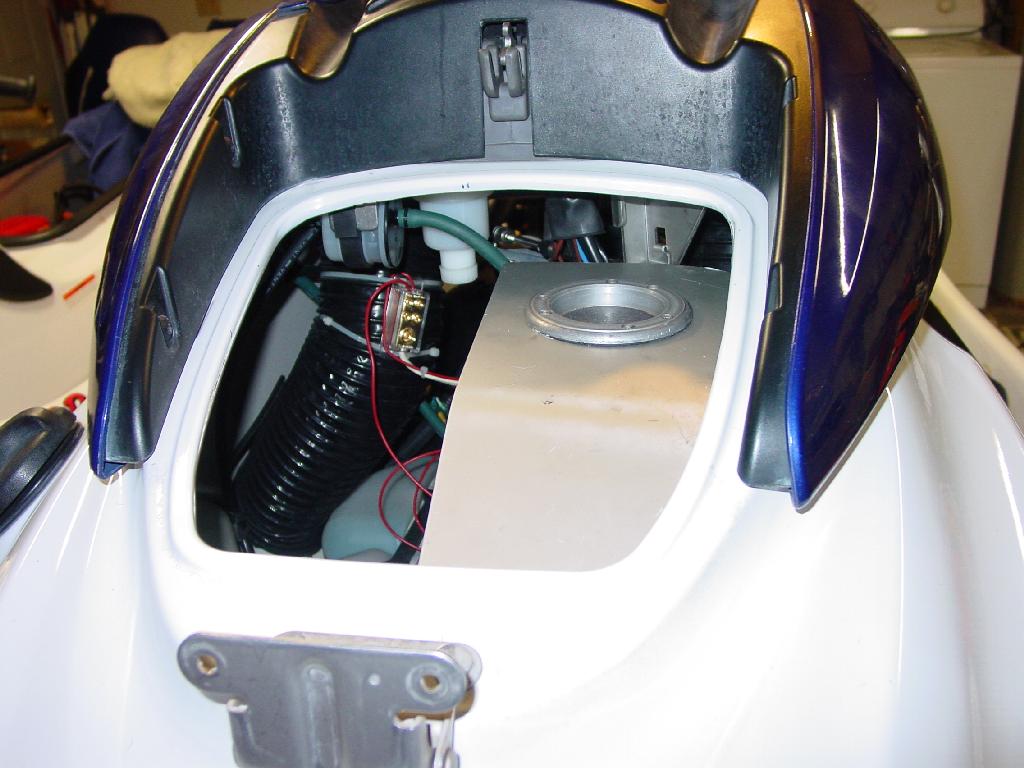
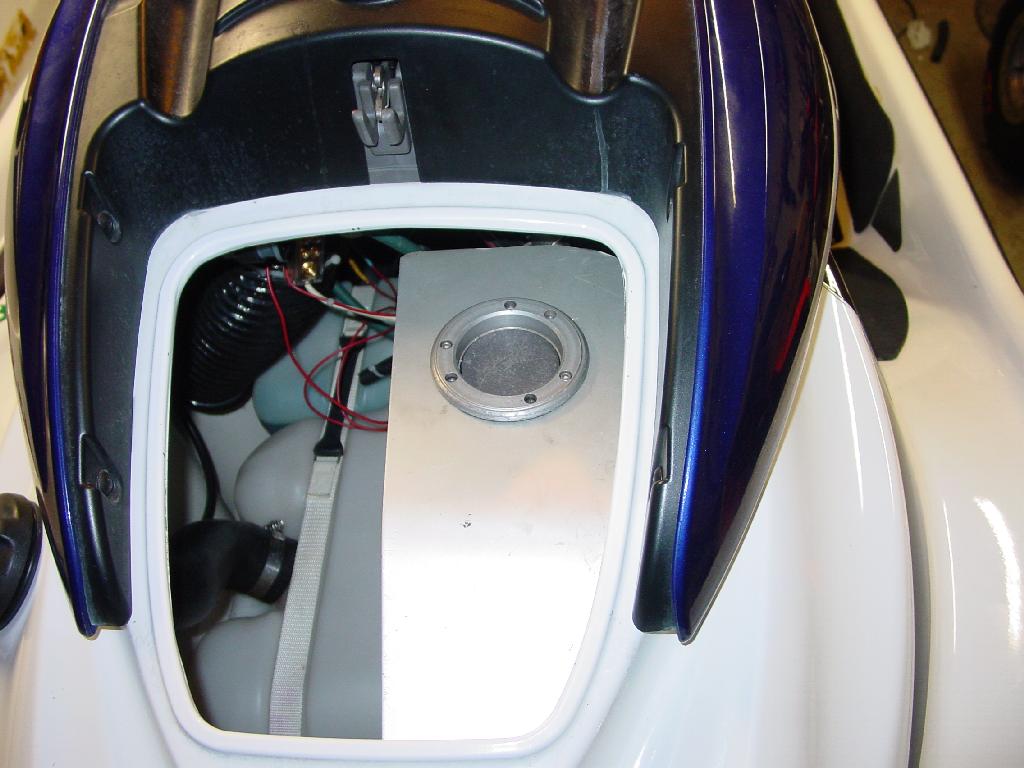 -1/4"
anodized support plate installed.
-1/4"
anodized support plate installed.
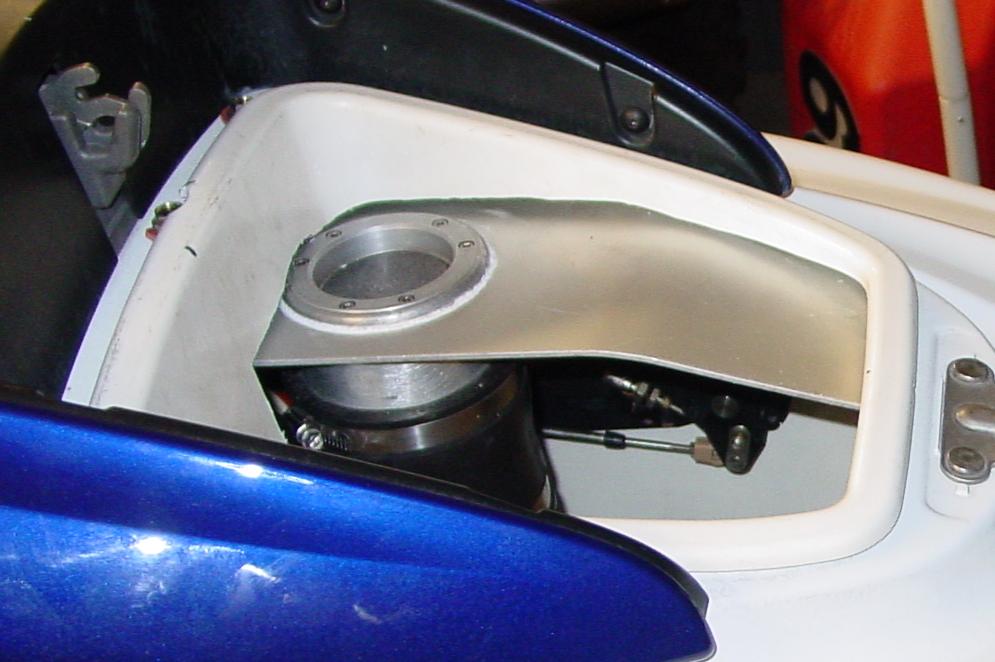
 -Side
view of support plate and assembly.
-Side
view of support plate and assembly.
 Holes
are drilled in the rear of the hood area, behind the lip to support the
plate.
Holes
are drilled in the rear of the hood area, behind the lip to support the
plate.
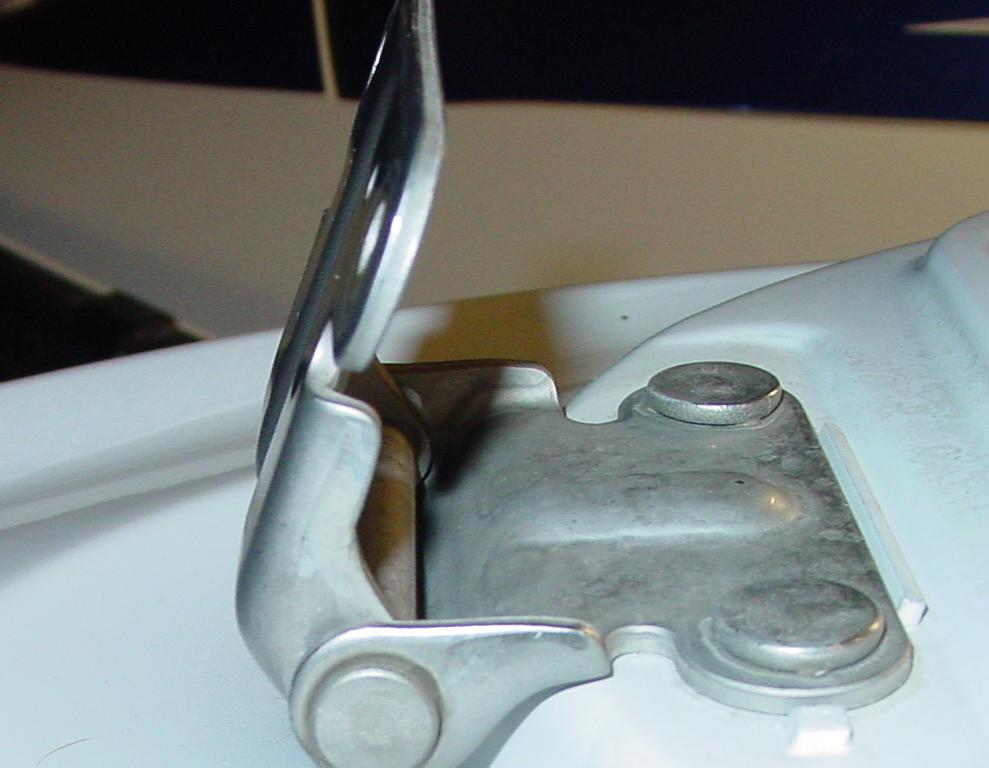 -Side
pic of stock hood hinge, before cutting.
-Side
pic of stock hood hinge, before cutting.
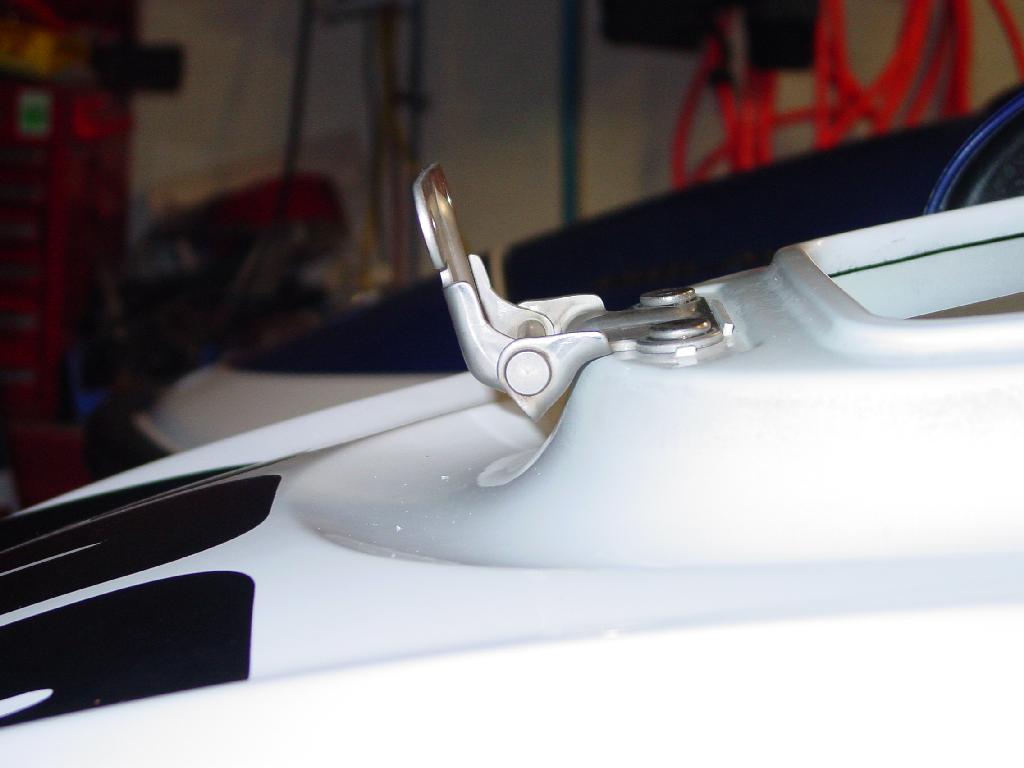 -Side
pic of modded hood hinge, after grinding. Unfortunately, I went TOO far.
The hood installed hits the top deck. Whoops....Another $50+ dollar mistake.
However, it has lasted a few months now. I put a cushion on the outside
of the plastic hood assembly to help it not break. So far, so good. However,
it's just a matter of time.
-Side
pic of modded hood hinge, after grinding. Unfortunately, I went TOO far.
The hood installed hits the top deck. Whoops....Another $50+ dollar mistake.
However, it has lasted a few months now. I put a cushion on the outside
of the plastic hood assembly to help it not break. So far, so good. However,
it's just a matter of time.
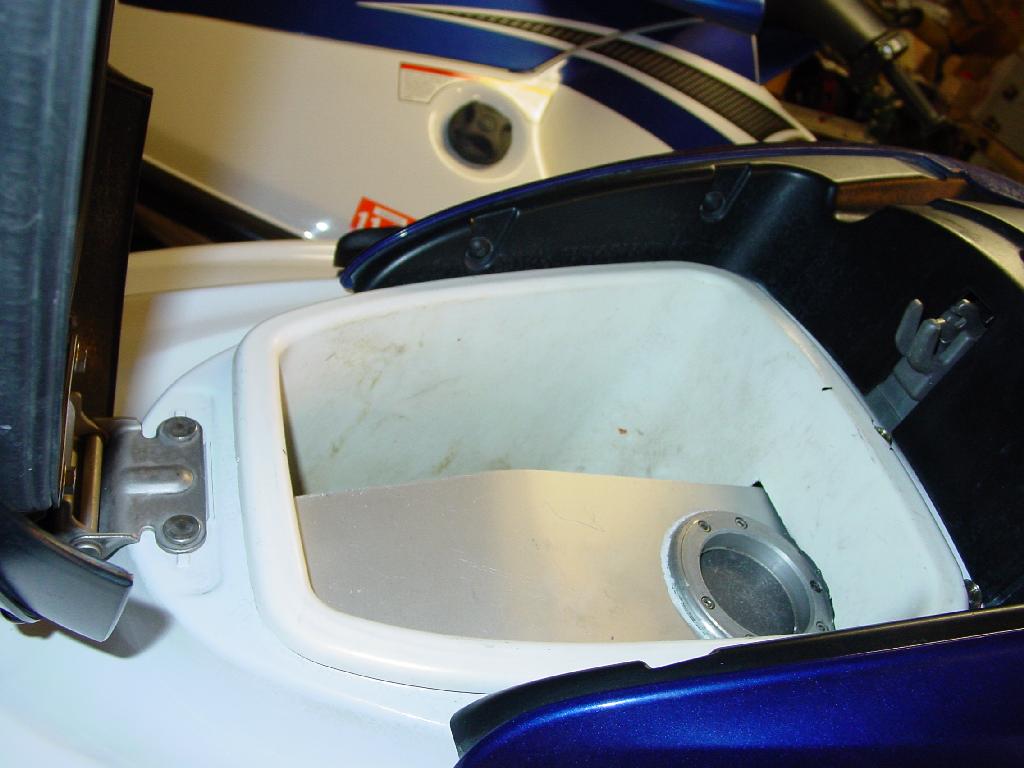
 It's
pretty much complete. However, now I've made an internal vent system..
It's
pretty much complete. However, now I've made an internal vent system..
|
|
| Send Email inquiries to: mer43@cox.net |
|
|