 |
 |
|
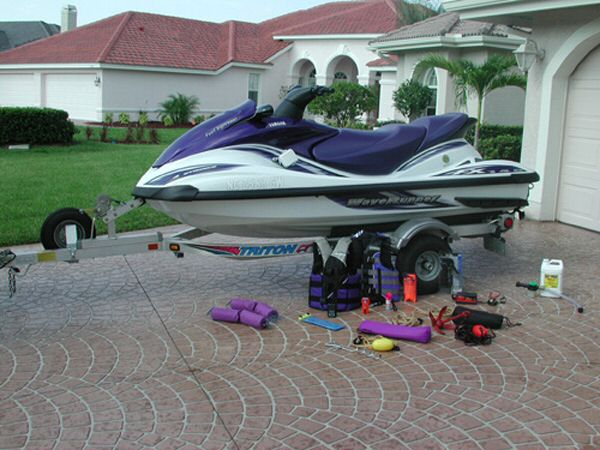
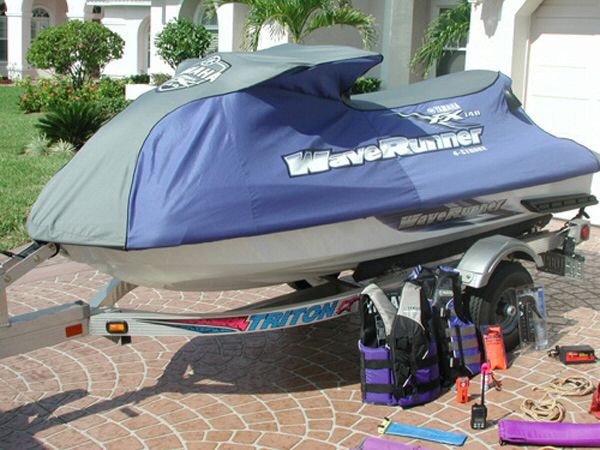
FOR SALE E-mail me at kviebrock@carolina.rr.com |
| This post is for
those of you who have always wished you could have stereo sound while cruising
around on your FX.
Before attempting
to install the stereo I asked around several dealers to find out if anyone
had
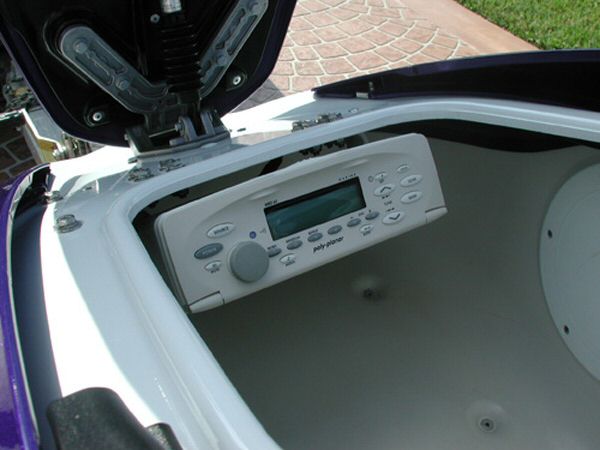
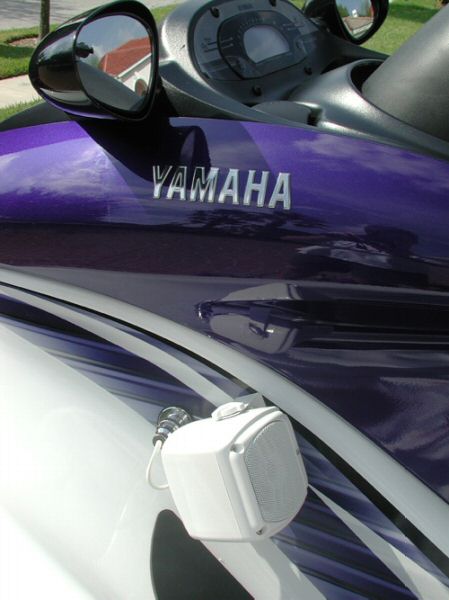
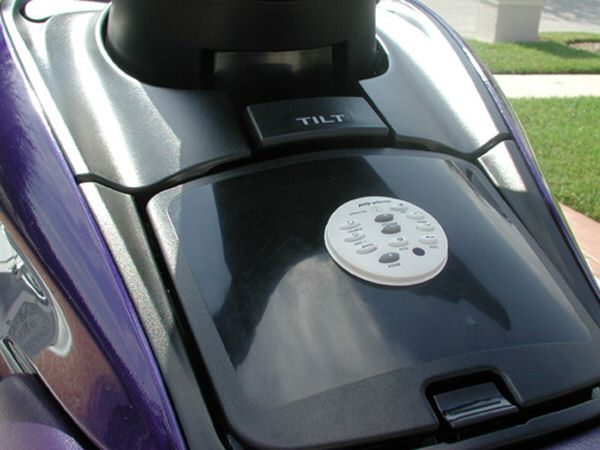
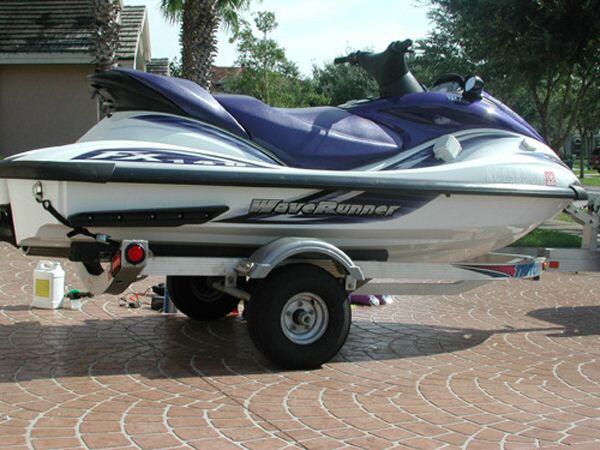
The forward compartment on the FX140 seemed like the only logical place to mount the stereo since it has plenty of space and it stays pretty dry for the most part. Atleast it does with me riding. I decided to use Poly-planar components since they have an excellent reputation for being waterproof, not just water resistant! All of the parts I used are completely stock. I actually bought the stereo (MRD 60) on ebay. The other parts (mounts, speakers, remote, etc.) I bought wherever I could find the best deal. I used a gimbal mount (WC 70) to install the stereo to the overhead in the forward compartment. The gimbal mount added a second level of waterproofing to an already waterproof stereo case. I made my measurements and drilled through the top of the compartment and mounted the gimbal using eight stainless bolts. I was sure to use plenty of silicone sealant around each bolt in order to keep the water out. Next, I used a hole saw to drill a hole in the glove box lid. This is where the remote (MRR-7) will be mounted. It is important to note that the remote interfaces with the stereo through a piece called the IMR-2 Interface. The IMR-2 interface is the only piece that doesn't get along well with the water. I decided that I would mount it to the overhead next to the gimbal mount. Before mounting the interface I used silicone sealant to touch up any places around the plastic body of the interface that might let water in. Now back to the remote. It was time to install the remote control cable. This is one long cable (10') with a plug on each end. One end of the cable plugs into the remote and the other end plugs into the interface. I had to remove the entire glove box in order to install the cable. Once the glove box was off I was able to drill a hole in the back of the box and run the cable about 6" inside. I used plastic cable tie mounting pads to secure the end of the cable to the inside of the glove box. The remote itself has a cable that is about 10". Now I had to get the other end of the remote cable to the interface box located in the forward compartment. I decided to run the cable up from the glove box and into the cable run that is located just below the intrument cluster. If you remove the plastic cover that reads "Yamaha" (located in the forward compartment just above the latch), you will see a bundle of cables that run down into the engine compartment. Once inside the engine compartment it was simply a matter of running the remote cable up and over the bulkhead and into the foward compartment. I should mention that anytime I ran a cable I was sure to secure it to the hull using cable ties and mounting pads. I reinstalled the glove box and placed the remote control unit into the hole I had drilled. It fit like a glove. I connected the the remote control to the cable and the remote install was complete. Next I marked off where I wanted the speakers (MA840) to be placed. They are each mounted on stainless steel gimbals that are painted white. I mounted the gimbals with the speakers facing up at an angle so that the sound is directed towards the riders. I made my measurements and drilled holes in the hull (2 on each side). I used rivets to secure the speaker mounts to the hull. Rivets seemed to give a more professional look than bolts. I think the most creative part is the thru hull speaker wire connections. I knew that there would be times when I would want to remove the speakers for whatever reason and I wouldn't want speaker wires dangling from the sides of the hull. So I used waterproof thru hull connectors that you can get at any boating supply store. There is a cap that screws on over each connector whenever the speaker wires aren't plugged in. Works great and the stainless hardware looks pretty cool too. Running the speaker wires was easy. Removing the rear panel in the forward compartment gave me access to the hull on both the port and starboard sides. I drilled holes where I wanted to place the thru hull connectors. I then ran the speaker wires from the stereo, up and over the aft bulhead in the forward compartment and then down to each connector. I soldered the speaker wires to the thru hull connectors for a more secure connection. I also used liquid electrical tape on the connections to prevent corrosion. Now that I had the wires from the stereo attached to the connectors I mounted the connectors to the hull using the supplied stainless hardware (and silicone sealant). The last part of the speaker installation was to attach the other end of the thru hull connector to each wire coming out of the speaker. Remember, the thru hull connectors are two pieces. One piece is always attached to the hull, and the other piece is attached the speaker wire coming out of each speaker. I simply trimmed the speaker wire to length (about 8") and soldered it to the connector. I attached the speakers to the speaker mounts and screwed the speaker wire connectors together. Speakers are installed! The antenna was the easiest part. I bought a "soft wire AM/FM antenna" from my local boating supply store. It's only about 24" long. I routed it along the inside of the forward compartment and secured it using plastic cable tie mounting pads. The last thing to do was get power to the stereo directly from the battery. I think I used 12 guage electrical wire. I ran the wire from the battery, along the port side hull in the engine compartment, and up into the forward compartment. It was a pretty simple run that shouldn't need anymore explanation. Now for the moment I had been waiting for. I turned it on and......everything work just like I had planned. As far as power consumption goes, I've been anchored and docked and have left the stereo on for more than 30 minutes without any problems. Of course, the battery gets its recharge whenever the engine is running. I've never had a dead battery while on the water, however I have had it die on me when I forgot to put it on the trickle charger while it sat in the garage for 3 weeks. I thought about installing a second battery but I changed my mind when I saw how well the one battery handled the load from the stereo. How well does it handle the water you ask? Well, the speakers and remote get wet every time I ride and every time I get home and wash it. The stereo unit has gotten a little splashed but nothing major. I don't think the interface has gotten wet (yet). All in all, everything has worked great! You have to understand that I didn't install the stereo so that I could have music while cruising at wide open throttle. I installed it so that I could have something to listen to while hanging out at the beach, cruising thru the numerous no-wake zones in FL, or cruising along at 20-30 mph. For these situations it's perfect. Even though it is a loud stereo anything faster than about 30-35 mph and you can't really hear it. CD skip can be a problem if you hit the wakes hard. But for normal cruising with a slight chop the play is smooth. All in all, I spent about $600 on the stereo and misc. parts. Luckily I could do all the work myself or that price would have been a bit higher. All of the hardware I used was stainless and I was sure to use plenty of silicone sealant around any bolts that went through the hull. '03 FX140
|
|
|
 |
 |
 |
 |
|
LINKS TECH MUDHOLE FOR SALE SEARCH |